In addition to standard #10 dual window white envelopes, Postalytics gives you the power to design, create and order #10 single window custom envelopes that you can include your own graphics, text and designs on.
Postalytics custom envelopes are ordered right through the application, stored in inventory and used in your direct mail campaigns. The custom envelope feature works similar to other Postalytics formats, but with a few key differences.
The similarities include:
- You can design custom envelopes in the editor and upload creative you’ve designed offline.
- You utilize the Proofer to generate PDF versions of your envelope. You must sign off on the proof prior to using a custom envelope.
- Custom envelopes are stored in the Template Listing as either Draft or Proofed status, where they can easily be edited, copied, proofed or deleted.
- The same letter templates are used for custom envelopes and standard envelopes. You select the letter template and the envelope template in the Campaign Wizard.
There are a few important differences between the way that custom envelopes are created and managed vs. other creative formats:
- Envelopes are “no bleed” i.e. there’s a “cut-off” around the edges of the envelope, creative does not stretch to or beyond the edge of the canvas.
- There is no personalization (variable data or variable logic) that can be applied to the custom envelope, only images, graphics and text.
- Custom envelopes are purchased and ordered in advance (only after proof of acceptance), and require 3-6 weeks* for fulfillment, before they can be used in campaigns. *Contact Support for current delivery times.
- There will be an email notification sent to the email address(es) listed in your profile system email(s) indicating that your order is fulfilled and ready, along with a visual indicator.
- During the printing of a campaign with custom envelopes, a small quantity (+-2%) of envelopes may be used for setup and testing.
Custom Envelope Design Specifications


Postalytics custom envelopes are standard #10 single window envelopes that are 9.5 inches wide and 4.125 inches high. There are reserved areas of the canvas for the recipient address to show through the single window, and for the postage to be applied. We recommend that all content be located within the “Safe Zone” as identified in the image above.
Note: The area reserved for postage will be printed in a lighter shade of the color or image behind it so that it complies with USPS regulations for allowable contrast in order for the reading of the postage indicia.
You can place content (text/images) on the back of the envelope as well, within the safe zone below the envelope flap.
Download Our Adobe® Creative Cloud® Zip File
We’ve packaged up the specs for custom envelopes, along with our other postcard and letter formats, in an easy to use .ZIP file that when unzipped, can be used with the Adobe® Creative Cloud® tools. There are separate directories with design files for:
- Adobe® Photoshop® (Recommended)
- Adobe® Illustrator®
- Adobe® InDesign®
Important: Front Envelope Background Images must be saved at exactly 300 dpi, not higher or lower.
| Guides | H x W (in) | H x W (px) |
| Full envelope size (no bleed) | 9.5” x 4.125” | 2850 x 1238 px |
| Envelope Front Safe/Cut Off Zone | 9.25” x 3.875” | 2775 x 1163 px |
| Envelope Address Area | 4.5” x 1.125” | 1350 x 338 px |
| Address Area Safe Zone | 4.75” x 1.375” | 1425 x 413 px |
| Envelope Stamp Area | .75” x .75” | 225 x 225 px |
| Envelope Back Safe/Cut Off Zone | 9.25” x 2.25” | 2775 x 675 px |
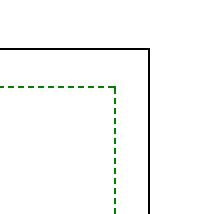
Keep all images and text within the dotted green line boundary to ensure everything gets printed on the envelope.
No Bleed
Because of the way envelopes are printed, images, text and color will not extend to the edges of the envelope, there’s “no bleed”. This means that your design should account for the fact that at a minimum, there will be a thin white space around the edges of the envelope.
The outside edge of the envelope is the black line in the background of the editor.
Examples of Acceptable and Unacceptable* Designs
Acceptable:
OK to print. Full Color, CMYK with light to moderate ink coverage.
Unacceptable:
Uploading designs with heavy ink coverage or full bleed may require conversion, causing delays and extra cost.
In rare cases the design may be rejected by the printer.
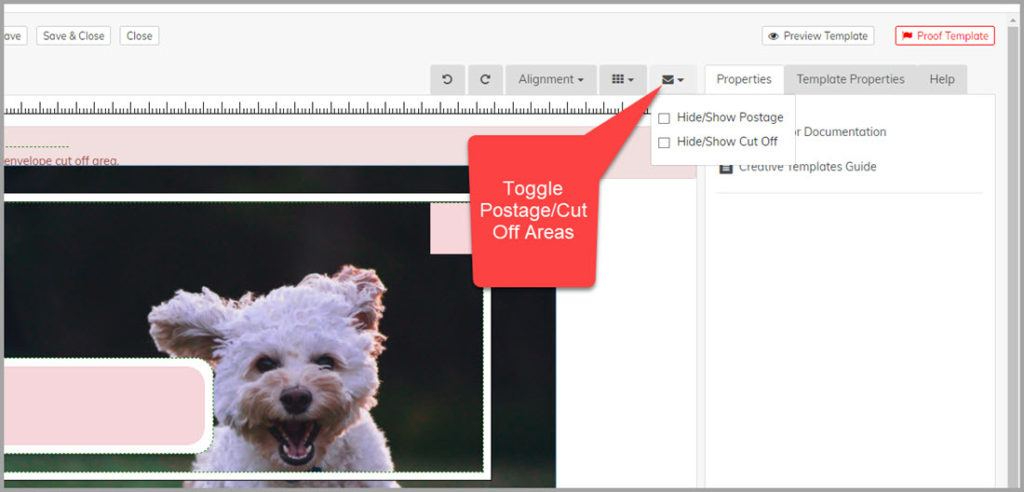
Hide/Show Postage And Cut Off Areas
While you’re working with the envelope editor, you can toggle on and off elements that help you see the location of the postage and address areas, as well as the Safe/Cut Off areas of the envelope.
Design Your Envelope In The Envelope Editor
In the Postalytics application, from the Creative drop down menu, select New Template. You can choose to create custom envelope templates from scratch in the Editor or Choose Pre-Built Templates. If you choose a Pre-Built template, you can pull one into the editor and use the tools in the rest of the article to modify it to your needs.
We’ll create a custom envelope template in the Editor to start. To begin, select Create in Editor.

Build Template from Scratch
Complete the steps to start creating your new template. Select Choose Your Template Type and select Envelope.

Postalytics Envelope Editor
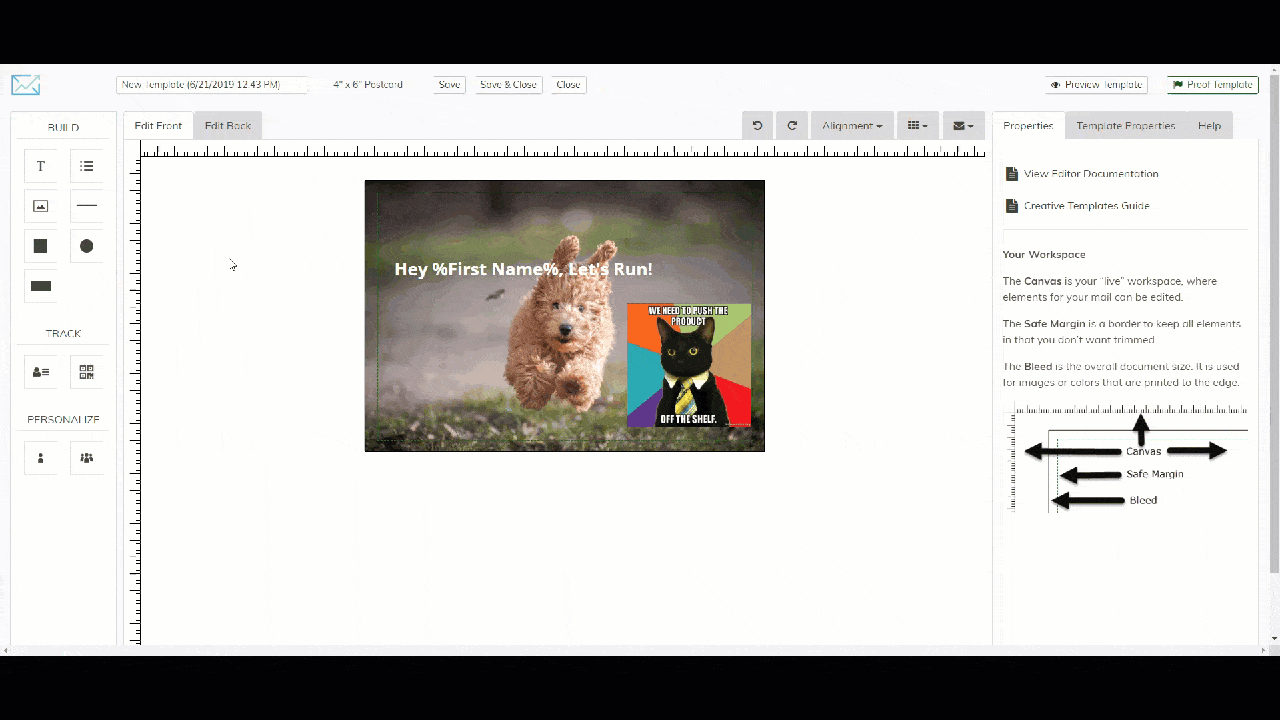
Let’s do a quick run through of the features. The middle area of the editor is where you will design and build your envelope, we call this the canvas.
The dotted green line is the safe margin. Keep all text, shapes, and images that are not meant to abut to the edge within this boundary.
Naming Template
The top of the editor is the area to Name Your Template, Save, Save & Close, and Close. When selecting Close, be aware that no changes will be saved. Always save your work.

The tabs on the top left indicate whether you are editing the front or the back of the envelope.
The tabs along the top right of the envelope canvas are:
- Undo
- Redo
- Alignment
- Snap to Grid
- Hide/Show Postage/Address Area and Cut Off Area Toggle

Build Panel
To the left of the canvas is the Build Panel. Here, you can click and drag the icons onto the canvas.
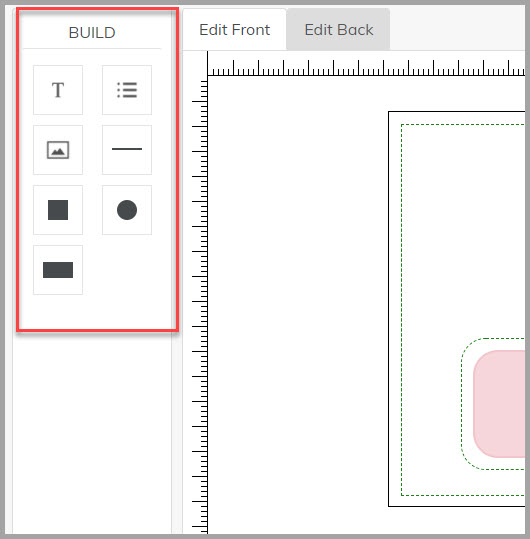
Build
Features include adding:
- Text
- Bullet List
- Images
- Horizontal Line
- Squares, Circles
- Rectangles
Use the elements by clicking and dragging to the canvas.
Properties Panel
To the right of the canvas is the Properties Panel. When you are not actively using the editor, this panel will display helpful editor tips if you get stuck.
Styles Tab
When an object or text is selected on the canvas the Properties tab displays, allowing you to toggle between the Styles, Arrangement, and Effects tabs.
The Styles tab allows you to adjust:
- Font Family
- Font Size
- Text Color
- Highlight Color
- Weight
- Decoration
- Alignment
- Line Height
- Style
- Letter Spacing
- Width
- Height
This is also where you can Delete or Duplicate the element on the canvas.

Arrangement Tab
Use the Position arrows or Top (px) and Left (px) to move text blocks, images, or shapes on the canvas.
Arrangement buttons Forward and Backward allows you to adjust how a text block, shape, or image is layered on the canvas. You can choose to move the element up or down a single layer (middle buttons) or all the way to the front or rear (end buttons).
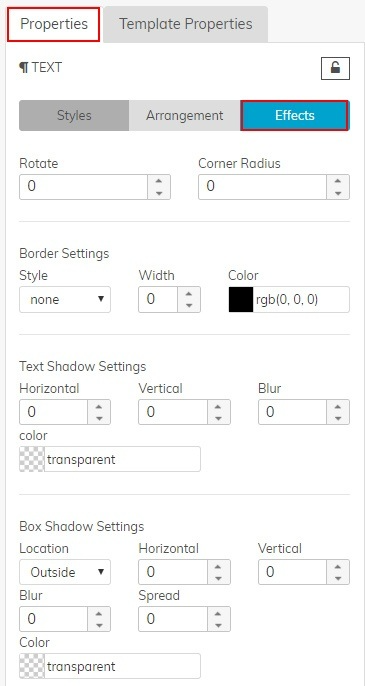
Effects Tab
Effects provide more advanced features for creative development:
- Adjust text blocks, images and shapes using Rotate, Corner Radius
- Border Settings: (Style, Width and Color)
- Text Shadow Settings (Horizontal, Vertical, Blur and Color)
- Box Shadow Settings (Location, Horizontal, Vertical, Blur, Spread and Color)
Template Properties Panel

Default Template Font
By changing the Default Template Font, the Direct Mail Editor will apply the single font change to the entire mail piece rather than changing each text block individually.
Front Template Settings
Overlay Color allows you to select a color and apply a transparency to give your background image a color effect. Sometimes using overlay colors can help darken the background image to improve readability of text over images.
Background Image
It is easy to add a background image that contains images, designs, logos and text. Just be sure to design around the Address Area and Postage Area on the envelope. You can upload images to the Asset Manager at any time.
Envelope background images must conform to the following specs: Width = 2850px, Height = 1238px, 300 dpi. Please remember that if the dpi is higher or lower, even if the height and width are correct, your image may not upload, or render properly.
Add a background image by selecting Browse (to choose images from the Assets that you’ve uploaded) or select Search to look through a library of over 200,000 high resolution free photos. You also have the option to place the background image on both sides of the envelope.
Search Free Images
In the search feature, search keywords of images you are looking for. When you see an image you like, select Preview or Select.
Preview will show the full size image and Select will import the photo onto your canvas.
*IMPORTANT* When using the free image search tool, we recommend downloading the image and resizing to the appropriate template size. Then, upload the image back into Postalytics. For this instance the background image measurements are 8.5 x 11 inches or 2550 x 3300 pixels.
Preview and Proof Template
An important part of the process of creating an envelope template is the method of previewing and proofing.
Preview Template provides a PDF download to get a closer look of how the finished product will look. This is a great tool to use throughout your design process.
Proof Template also provides a PDF download in addition to importing sample data or data from your list to populate the address area to see how the finished product will look.
The Proof Template is an extremely important feature that needs to be completed before using the envelope design in a campaign.
