Whether your Campaign is a Smart Send or Triggered Drip, your Campaign Settings Page is easily accessible.
On this page you’ll be able to view the current settings, make updates to certain criteria if needed, access the Postalytics Tracking Code, and access the Variable Data and Variable Logic Assistants to personalize your landing page.
Let’s take a few moments to walk through the page and it’s features.
How to Access the Campaign Settings
There are two ways to access the Campaign Settings
From the main Campaigns page, click the more options icon to the right of the Campaign Name, then click on ‘Settings’.

Or, from the Campaign Dashboard, click the 'Settings' icon in the upper right.

What Can I find on the Campaign Settings Page?
The first section of the Settings Page includes the Webhook URL, Authentication Key and the Authorization Header. These are typically used in/for Triggered Drip Campaigns.
In the following section, you'll find the Campaign Name (read on to learn more about updating a campaign name), Campaign Type and Endpoint. Endpoint will be blank if the campaign is a list based, smart send campaign.

The Campaign Name can be changed by typing in the new desired name then clicking the blue ‘Save Settings’ button.
It’s important to note that any changes here will update the Campaign Name, however the Campaign Mail Drop Name will remain as it was originally. This is because the Campaign Mail Drop Name is tied to many of our internal and print partner processes.
The following screenshots provide an example:
Original Name

Update name, then ‘Save Settings’

In the Campaign Library, the Campaign is listed with the updated name

However, in the Campaign Dashboard, the original name remains, as the mail drop name, along with the mail drop id number

Starting URL
Below the Endpoint is the Starting URL. This contains the URL that was entered during the Campaign set up.

Update the Starting URL
We often have clients who want to change the starting URL for their pURL or QR after they’ve launched the campaign, and this can easily be done here in the Campaign Settings.
Type in the new URL for your landing page, then select, ‘Save Settings’.
Note: In order for Postalytics to continue to track visits to any updated landing page, you’ll need to make sure the Postalytics tracking code has been added to that page.
Postalytics will send out email notifications when a mail delivery status changes and/or when goal conversions take place.
The email addresses populated in this section automatically defaults to the Profile email, but can be updated at any time.

Update Emails for Notifications
Replace or add emails in one or both of the notification categories by typing in the new email address. If there is more than one email address, use a comma without a space to separate them.
Once completed, select, ‘Save Settings’.
Allow Duplicate Recipients
This feature will only be available in Triggered Drip Campaigns.
The default setting does not allow for a recipient to receive multiple mailings from the same Triggered Drip Campaign. But, we’ve found that in some circumstances our clients would like to send multiple pieces to the same recipient. If that’s the case for you, we’ve made it easy to allow for that.
Simply check the box, then click ‘Save Settings’.

Save Settings and Back to Dashboard
Once you’ve updated any of the above areas, be sure to click ‘Save Settings’, otherwise your changes will not be saved.
And, as you may have guessed, by clicking the ‘Back to Dashboard’ button, you’ll return to the Campaign Dashboard.

Campaign Status
This section allows you to manage the “Live or Test Mode” status of your online tracking.
Below is an example of what this looks like if the online tracking is in Live Mode. Here you can select ‘place online tracking in test mode’ if necessary.

Clearing Statistics during Test Mode
Any Statistics gathered while the Campaign is in Test Mode can be cleared out prior to the campaign going live again, or for the first time.
This example shows how this section looks when the Campaign is in Test Mode. When you’re ready to go live, you can choose to clear the stats or keep them by selecting the corresponding button.

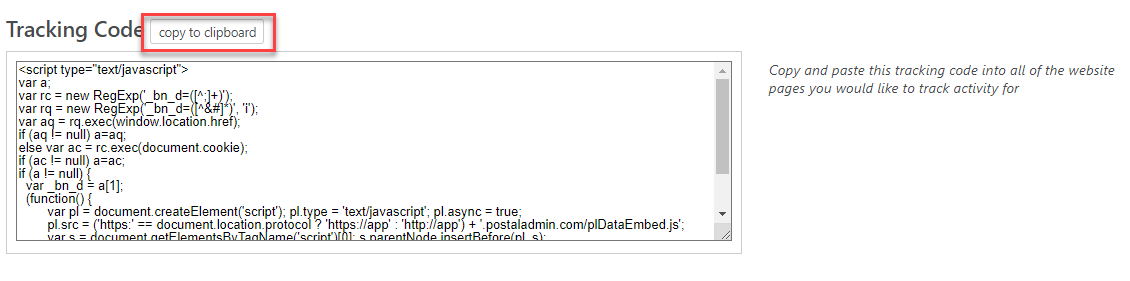
Postalytics Tracking Code
Next is the Postalytics Tracking Code. Copy this tracking code to insert in your landing pages, if you haven’t already, or if it’s needed for any updated landing page as mentioned above. This is very important to ensure offline to online tracking.
You can also access the Postalytics Tracking Code by clicking on Connect under your username, then 'Tracking Code' on the left side.

Variable Data and Logic Assistants
In this last section of the Campaign Setting Page, you’ll find Variable Data and Logic Assistant widgets to help you in creating personalized landing page experiences on your own site, using the data from your campaign.

Under Popup builder, select 'Click here' for the variable data and variable logic popups.
