Incoming webhooks are a simple way to use Postalytics Triggered Drip Campaigns to “trigger” Postalytics Direct Mail from 3rd party automation tools.
Most modern CRM, Marketing Automation, Customer Data Platform and Email marketing tools now have the ability to send a webhook as a triggered event.
If you’d like to send mail with a Postalytics Triggered Drip Campaign with a data source that we haven’t yet built an integration with, the Incoming Webhook feature might be the tool for you.
How To Setup Incoming Webhook Triggered Drip Campaigns
Your first step will be to create a Triggered Drip Campaign in Postalytics. You can create your Triggered Drip campaign at no cost, test the Incoming Webhook from your database and make it live after you have tested.
Start from the top menu navigation: Campaigns > New Campaign > Triggered Drip > Setup Incoming Webhook. Follow the steps in our help doc, "Triggered Drip Direct Mail Campaigns", to finalize your Triggered Drip Campaign.
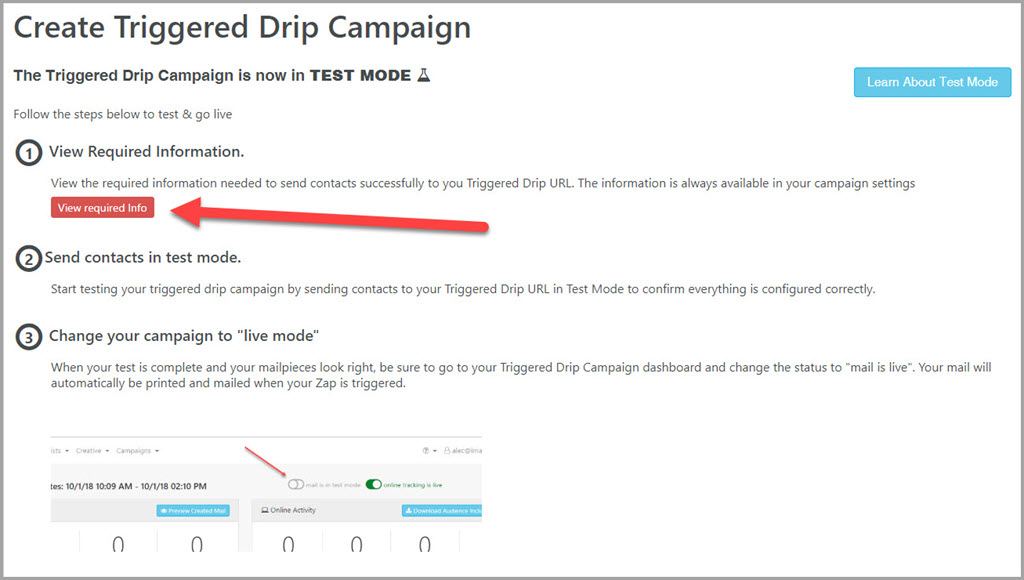
Note: After creating your Triggered Drip Campaign, you will arrive at a “What’s Next?” page. You’ll need to setup authentication between Postalytics and the tool you’re integrating with, as well as the HTTP Request info.
Access this by clicking on the “View Required Info” red button.

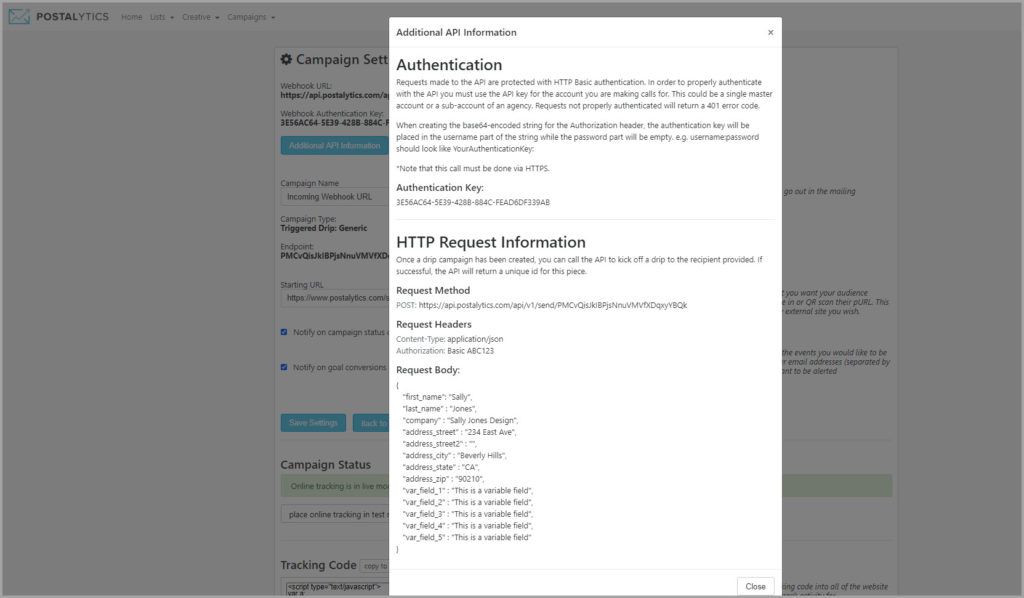
You’ll be directed to the Campaign Settings page where you’ll be provided with:
- The full Incoming Webhook URL (Request Method)
- The Request Header Information
- A sample of the Request Body JSON Payload. This includes required name and address fields, as well as “Variable” fields for personalization

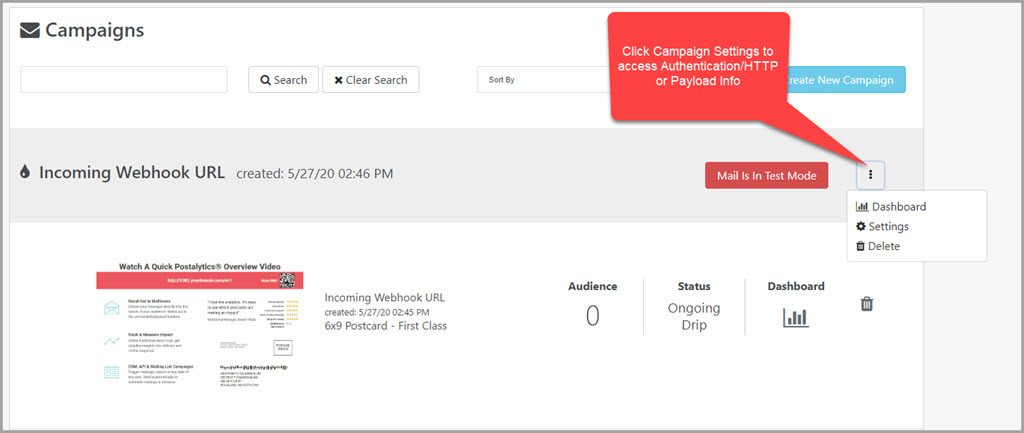
Note: You can always access this information by navigating to your Campaign Settings page.

Your Triggered Drip Campaign Is In “Test Mode” By Default
Postalytics Triggered Drip Campaigns are automatically set to Test Mode.
This is a feature that enables you to test your Incoming Webhook Workflow to make sure that it is triggering properly and that the connection to the Postalytics Campaign is working the way you want to – without actually sending mail!
Learn More About Triggered Drip Test Mode
When you’re happy with the results of your testing, you can flip your Postalytics Triggered Drip campaign to Live Mode, and then purchase your Direct Mail Credits, if needed.
To Turn Your Campaign “Live” You Need Credits
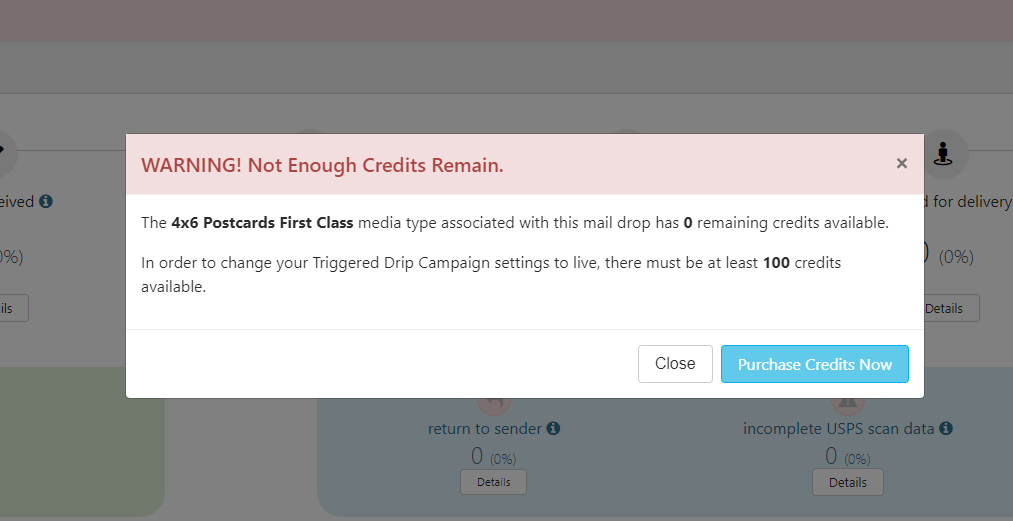
Before your campaign can be turned live, you’ll need to have at least 100 Direct Mail credits for the format that you’ve chosen. (By format, we mean the creative format/postage combination, such as 4×6 First Class, 6×9 Standard, or Custom Envelopes). If you already have credits, your campaign will seamlessly turn live.
If you don’t have at least 100 credits, you’ll need to purchase them. A pop up window will appear when you use the toggle to switch to live mode from the Campaign Dashboard. if you do not have enough credits. Select “Purchase Credits Now” and proceed with the steps to purchase credits.


Once live, your campaign will “listen” for your Automation tool to trigger it, and send the postcard or letter you’ve chosen to each recipient with no further interaction. You can just sit back and relax while the campaigns keep rolling along.
The Campaign Dashboard – Analytics, Settings And Mail Preview
Your Triggered Drip Campaign Dashboard is the one stop shop for everything after your campaign is up and running. Visit your dashboard to:
- See the performance of the campaign – Learn more from our Direct Mail Analytics help articles
- Modify the campaign settings – starting & goal URLs, turn your online tracking on and off for testing
- See the actual mailpieces generated – Learn more here
Learn More About Postalytics
We love talking with clients, partners and marketers of all types about how Postalytics can be used to solve problems and build great campaigns. If you’d like to talk with us about our pricing or any other part of Postalytics – please reach out!
