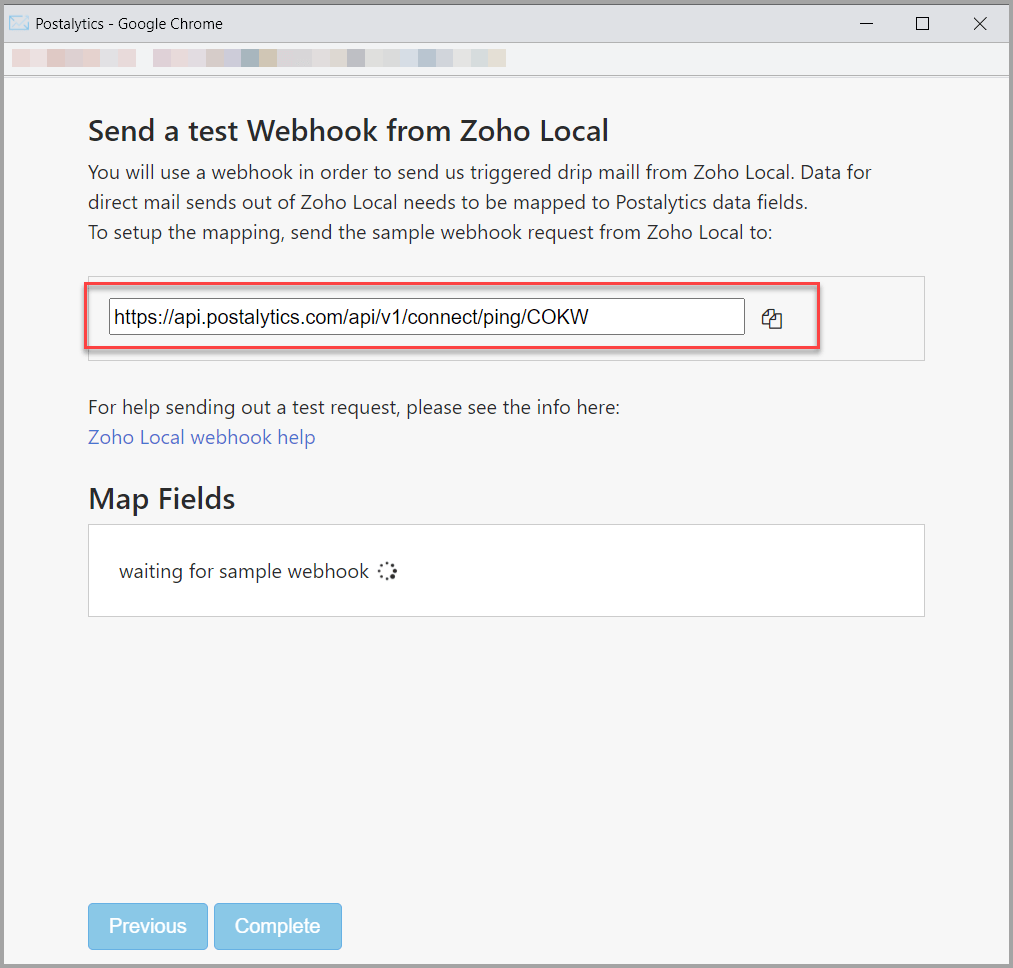
In the next configuration, you’ll be prompted to send a webhook ping from Zoho.
This important step will complete the mapping setup for the data sent in from Zoho to Postalytics in a Triggered Drip Campaign.
To complete this step:
Copy the ping URL generated from the integration wizard
Now, back In Zoho, on the page previously left open, paste the copied URL from Postalytics to ‘URL to Notify’.
If the page was not left open, go to Setup->Automation->Action->Webhooks and create a new webhook.
Be sure to select the Module.
 Scroll down to ‘Body’ and choose the options:
Type = ‘Raw’
Format = ‘JSON’
The body must contain the required fields as shown below, and you can add up to 9 additional personalization fields.
Required Zoho Contact Fields To Map
You can simply cut and paste the text below into the body, or Zoho allows you to start typing with a # and then you will be presented with a dropdown of value choices.
{
"first": " ${Contacts.First Name}",
"last": "${Contacts.Last Name}",
"address": "${Contacts.Mailing Street}",
"city": "${Contacts.Mailing City}",
"state": "${Contacts.Mailing State}",
"zip": "${Contacts.Mailing Zip}",
"id":"${Contacts.Contact Id}"
}
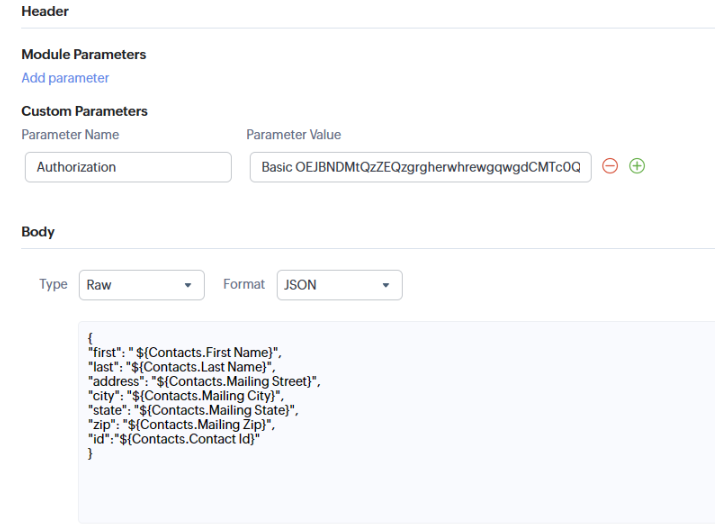
Next you will need to get your Postalytics Authorization Header that can be found under Connect then API Key. Once you copy that API key from your Postalytics account you will then need to paste it within your Zoho Header Parameter Value.
Example of Postalytics API Key and Authorization Header:

Additional Personalization Fields
You can map up to 9 other fields that you are tracking in Zoho Contacts or Leads using the same methodology.
Important Note: If you will be receiving Postalytics status codes back into Zoho, be sure to include the contact id in the webhook body.
Click ‘Save'
Next, you’ll trigger the webhook so that Postalytics receives it and the fields can be mapped.
To do this, go to Setup->Automation->Workflow Rules and create a new rule.
This trigger is only needed to send a sample ping to Postalytics so the Workflow Rule can be very basic.

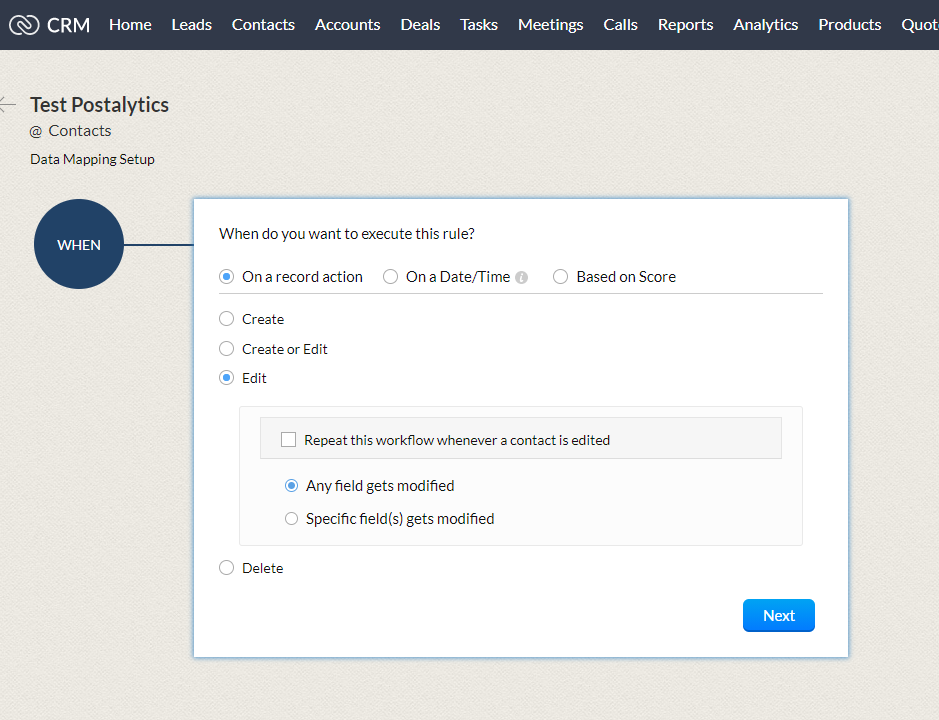
In this example, we’ll add a rule that triggers every time a contact is edited.
Select ‘Create Rule’

A pop window will appear. Select the Module, Rule Name and Description. Then click ‘Next’

You’ll then create the When, click ‘Next’
Create the Condition 1, click ‘Next’

And create the Instant Action. In this case it is ‘Webhook’

A Webhook popup window will appear. The Webhook previously created should be listed. Select that Webhook and then click ‘Associate’.

You can now click ‘Save’
The Workflow Rule has now been created.
This change will cause the webhook that you setup to trigger and send data over to Postalytics. It is important that this happen so we can make the connection between Zoho and Postalytics.
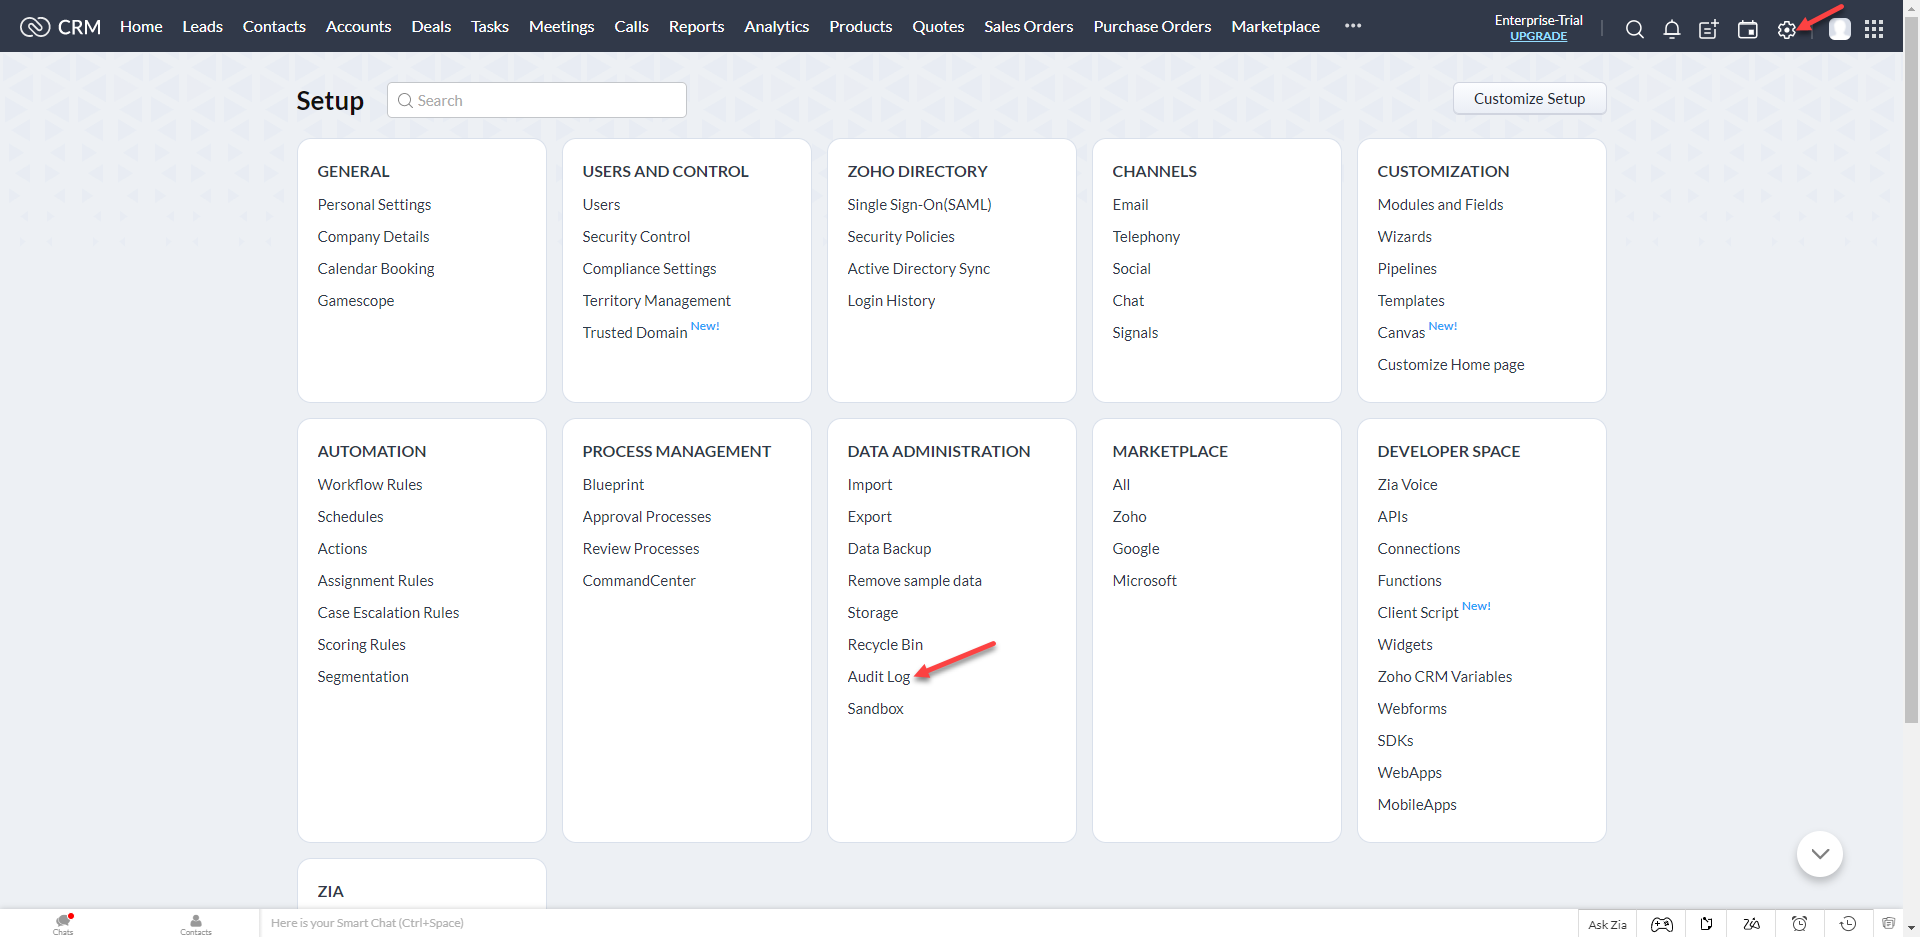
You can view the history of these steps within Zoho’s “Audit Log”, which can be handy during the Integration setup. You can find it by selecting Settings, then Audit Log, within the Data Administration section..