For lists that you’ve originally uploaded via .CSV or Excel files, Postalytics offers an easy way to Append a Direct Mail List.
This feature is not available for lists that were imported via integrations.
Please note that the contact records you wish to add to your list must contain the same data fields, and the same mapping as the contact list you’re adding to. This will ensure that all your contact records on this list have the same layout. For a quick view of your existing list columns, click the “Field Mappings” link on the list action menu.
The append feature adds additional contact records to a list, it does not add additional data fields to the list. Do not append new records to a list if there is an active campaign using that list. Postalytics will de-duplicate your append file, as well as the combined new file, using first name, last name, company. address, address 2, city, state and zip code to ensure that you don’t send duplicate direct mail pieces. Any duplicates found will be emailed to you in a report at the end of the append process.
Your append file must be a .csv (comma delimited) or excel file in order to be uploaded. For more information on how to prepare a file for upload, please visit our Contact List Tips page.
How To Append A Direct Mail List
From the Home Page main navigation bar, click Lists to go to the Contact Lists Page.

Locate the list you’d like to add contacts to and click the “Action” button and the +Append link from the dropdown.
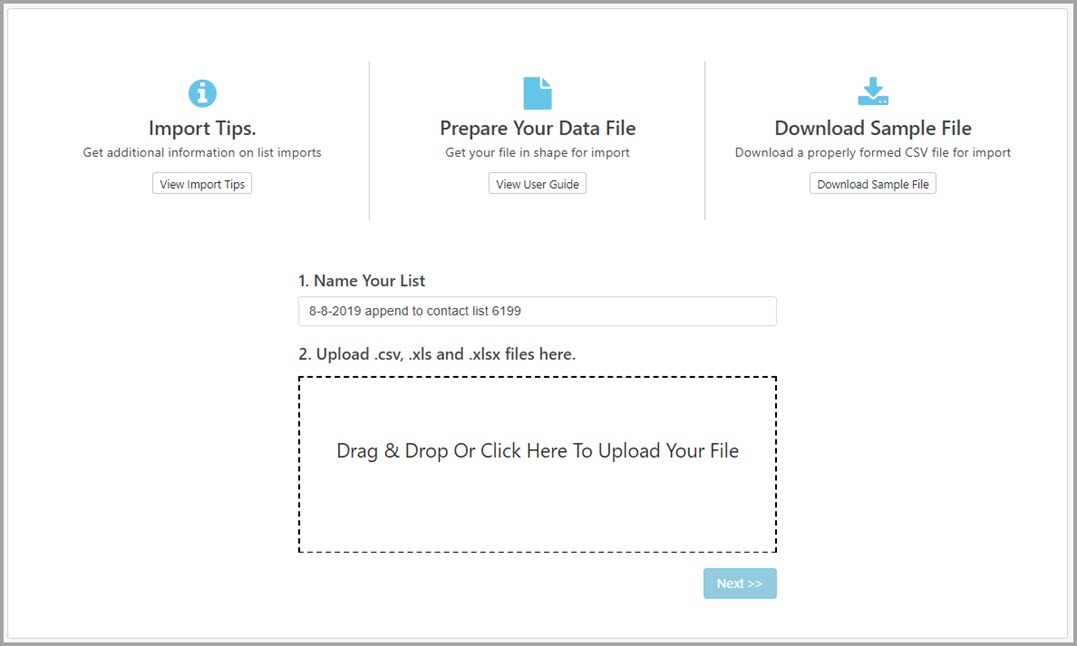
You’ll navigate to the screen below:

Name your append and select the .CSV or Excel file that you want to append into your existing list. Then, click the Next button.
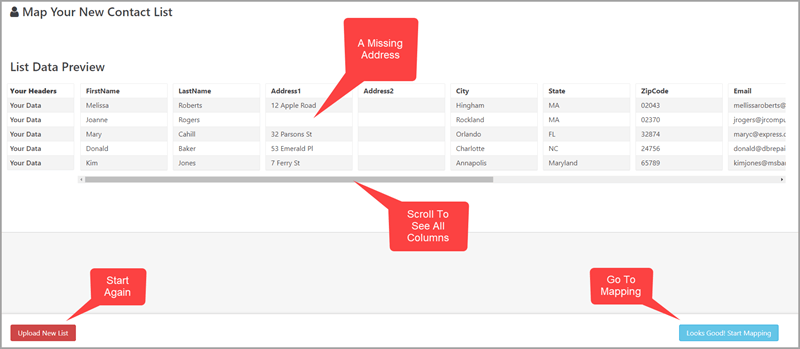
The next screen will show you a preview of your file data. You can see if there are any columns or data missing that you want to correct in the file. Remember, the columns need to match up with your existing columns.

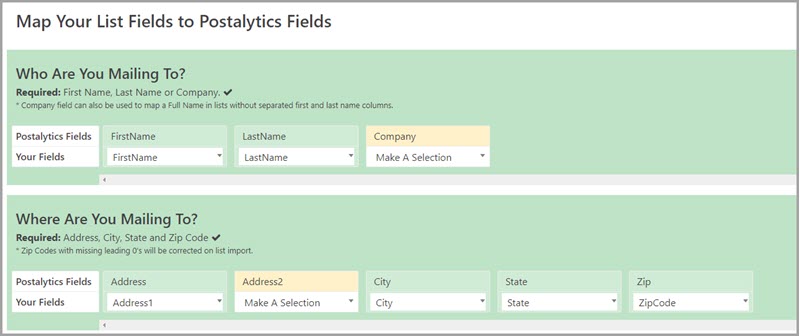
If all looks good, the next step is to map your append file columns into Postalytics.

You’ll need to map the required mailing fields, along with any personalization or other fields your existing list contains. It’s simple to click and select the data columns.
When you complete your mapping, you’ll be brought to a confirmation page, where you can review the mapping to make sure it is accurate.

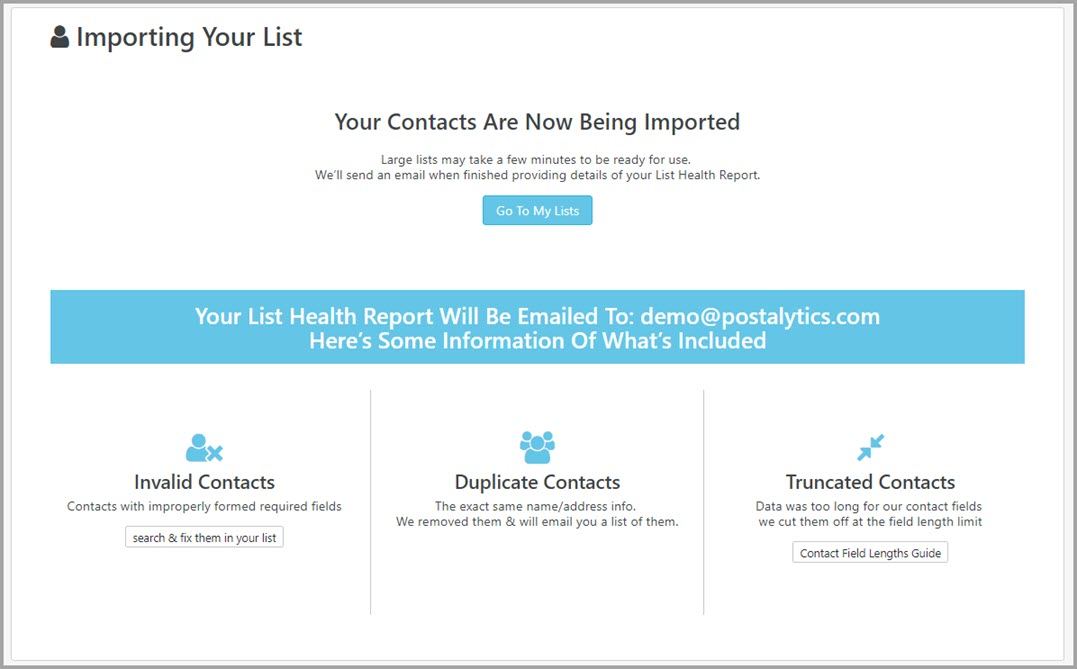
You can go back and re-map your columns, or click “Import Now” to proceed. The import process will start, and you’ll get an email confirming the process is completed. If the list is large, it can take a few minutes.

If Postalytics finds any duplicate records, the email confirmation will also include an attached .CSV file with your duplicates listed. We only keep one of the duplicates in your list so that you don’t send the same mailer twice to the same contact.
