
Creating and purchasing highly targeted mailing lists is now faster and easier than ever. Our seamless, integrated solution allows you to build and buy lists directly within your account—no more dealing with third-party sellers, filling out tedious forms, or waiting for quotes and approvals. Purchased lists are instantly added to your account and ready to fuel your next campaign.
With a minimum of just 20 records, you can quickly find, purchase, and mail to your ideal audience. Choose from detailed demographic, firmographic, and behavioral insights, all sourced from our industry-leading marketing database of 280 million consumers and 28 million businesses.
What’s New
We’ve redesigned the way you build an audience to make it simpler and faster. Here’s what’s changed:
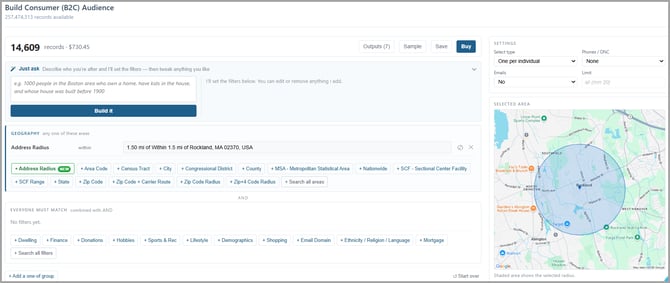
- A new single-page audience builder: Building a list now reads top to bottom on one page instead of across four columns. Pricing and checkout work exactly as before.
-
Just Ask (beta): Describe who you want to reach in your own words, and the builder sets up the filters for you.

-
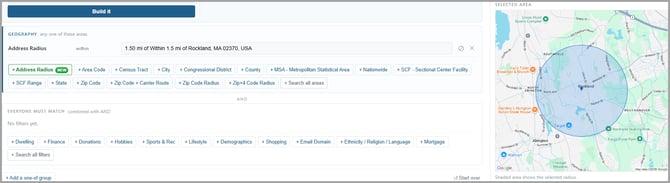
Address Radius search: Target the people around a specific address or an area, like a neighborhood, a business, or a job site.
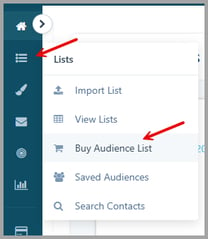
Access the List Buying Tool
From the Lists menu, click “Buy Audience List”.
Welcome Screen
Until an audience has been built, purchased and saved, you will see a Welcome screen. Click “Create New Audience”.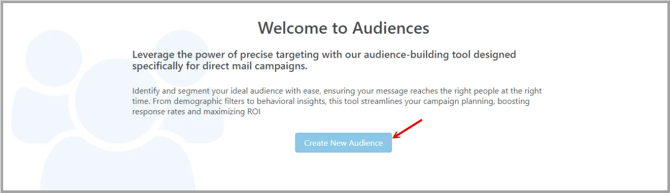
Build Audience - Data Sources
The data source selection page contains all data source categories available for query. Each data source category summarizes what the list is, along with the cost per record. Email and Phone outputs are additional charges on most data sources. Those costs are also listed here.
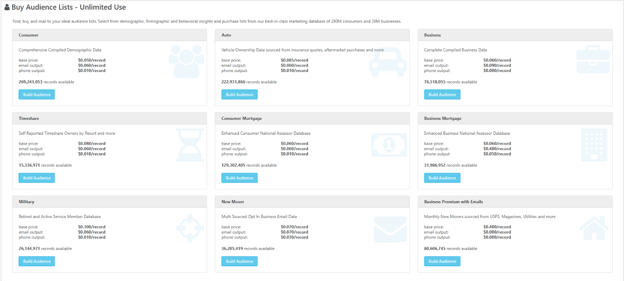
Click “Build Audience” for the chosen data source category.
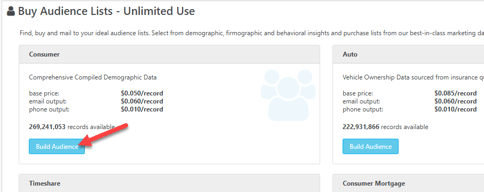
Build an Audience
Every data source category available will have a different set of selects, however, the general layout and the process for selection is the same for all.
Building an audience happens on a single page that reads from top to bottom:
At the top you’ll see:
- The record count and price
- The buttons for Outputs, Sample, Save, and Buy
- Settings for the selects
Next is the Just Ask list builder tool, followed by the filters, with a map of your selected area to the right.
Settings
Ready to begin building your list? Start with your Settings:
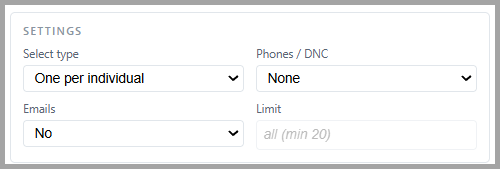
Select Type: Use the drop down to select the de-dupe option for the output. Choices include:
- One per individual
- One per address
- One per household
- All
Phones/DNC: Not all data source categories have phone outputs available, but those that do will have a drop down for selecting the phone type available on the record to be selected for output. Choices include:
- None
- Landline
- Mobile
- Mobile priority
- Landline priority
- All
* Note that most phone outputs will incur additional per record fees.
Emails: If the Email is toggled to “Yes”, then all output records must have an email.
* Note that most email outputs will incur additional per record fees.
Limit: If you would like to limit the number of records in the list, do so within the “Limit” box.
* Note that there is a limit minimum of 20.
If your limit asks for more records than match your filters, the builder lets you know and charges you only for the records that are actually available. Clearing the limit returns the count to its original number.
Price & Count
The Count and Pricing is dynamically updated as the count changes. Unit price varies by the data source.
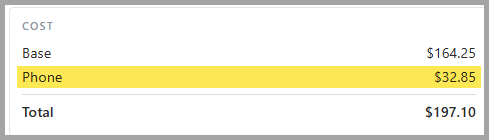
A single line total will be shown if the phone and/or email selections are not made.

If those outputs are selected, those line totals will also be shown above Settings with Base, Phone/Email, and Total lines.
Two Ways to Build an Audience
1) Just Ask (beta)
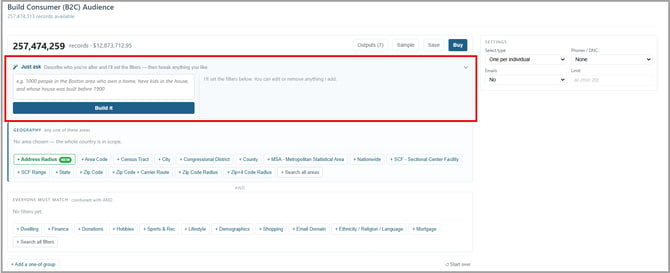
If you prefer to describe your audience in your own words, Just Ask lets you type who you want to reach, and it sets up the filters for you. For example: “1,000 homeowners in the Boston area with kids, in homes built before 1950.”
You’ll find this feature just below the count, whenever you’re signed in to your account.
- You stay in control: Everything Just Ask sets appears as normal filters on the page, so you can check, change, or remove any of them before you buy.
- Refine as you go: Keep typing to adjust, for example “add zip 02043,” “remove the homeowner filter,” or “start over.”
- No guessing: If Just Ask can’t do something, it tells you instead of guessing. It never buys anything on its own; purchasing is always your call.
2) Manually choose your selections
Address Radius*
Address Radius filter is offered in both Just Ask and when building an audience manually.
*Address Radius is available on data sources that support it. If you don’t see the filter, that data source doesn’t offer it.
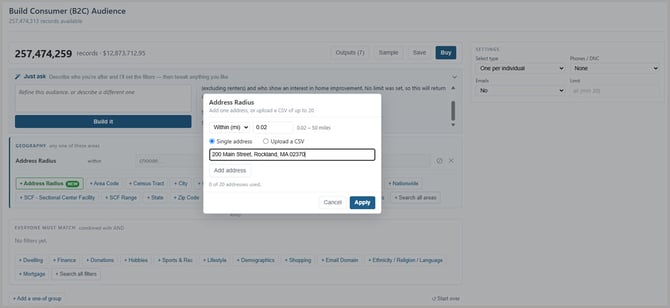
Want to reach the people around a specific location, like a neighborhood, a business, or a job site? Use the Address Radius filter to target your audience in two ways:
- Within a distance: Reach everyone within a set distance of an address, from 0.02 miles (about 100 feet) up to 50 miles. You can set the distance to the hundredth of a mile; it starts at 1.50 miles.
- The closest N: Ask for a set number of records, such as “the 500 nearest households,” and the builder works out the distance for you.
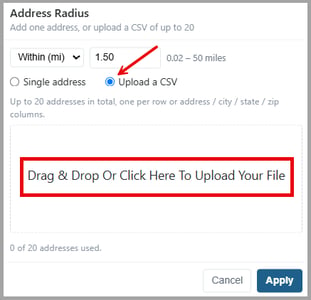
Filter Many addresses at once: Upload a list of up to 20 addresses to build a radius around each one. If any address looks far from the rest, the builder flags it so you can double-check it before you buy.
Works with other areas: You can combine radii with cities, zip codes, or states. Like other areas, they widen your audience.
Map: As you add areas, a map below your settings shows where your audience is, so you can see your coverage at a glance.
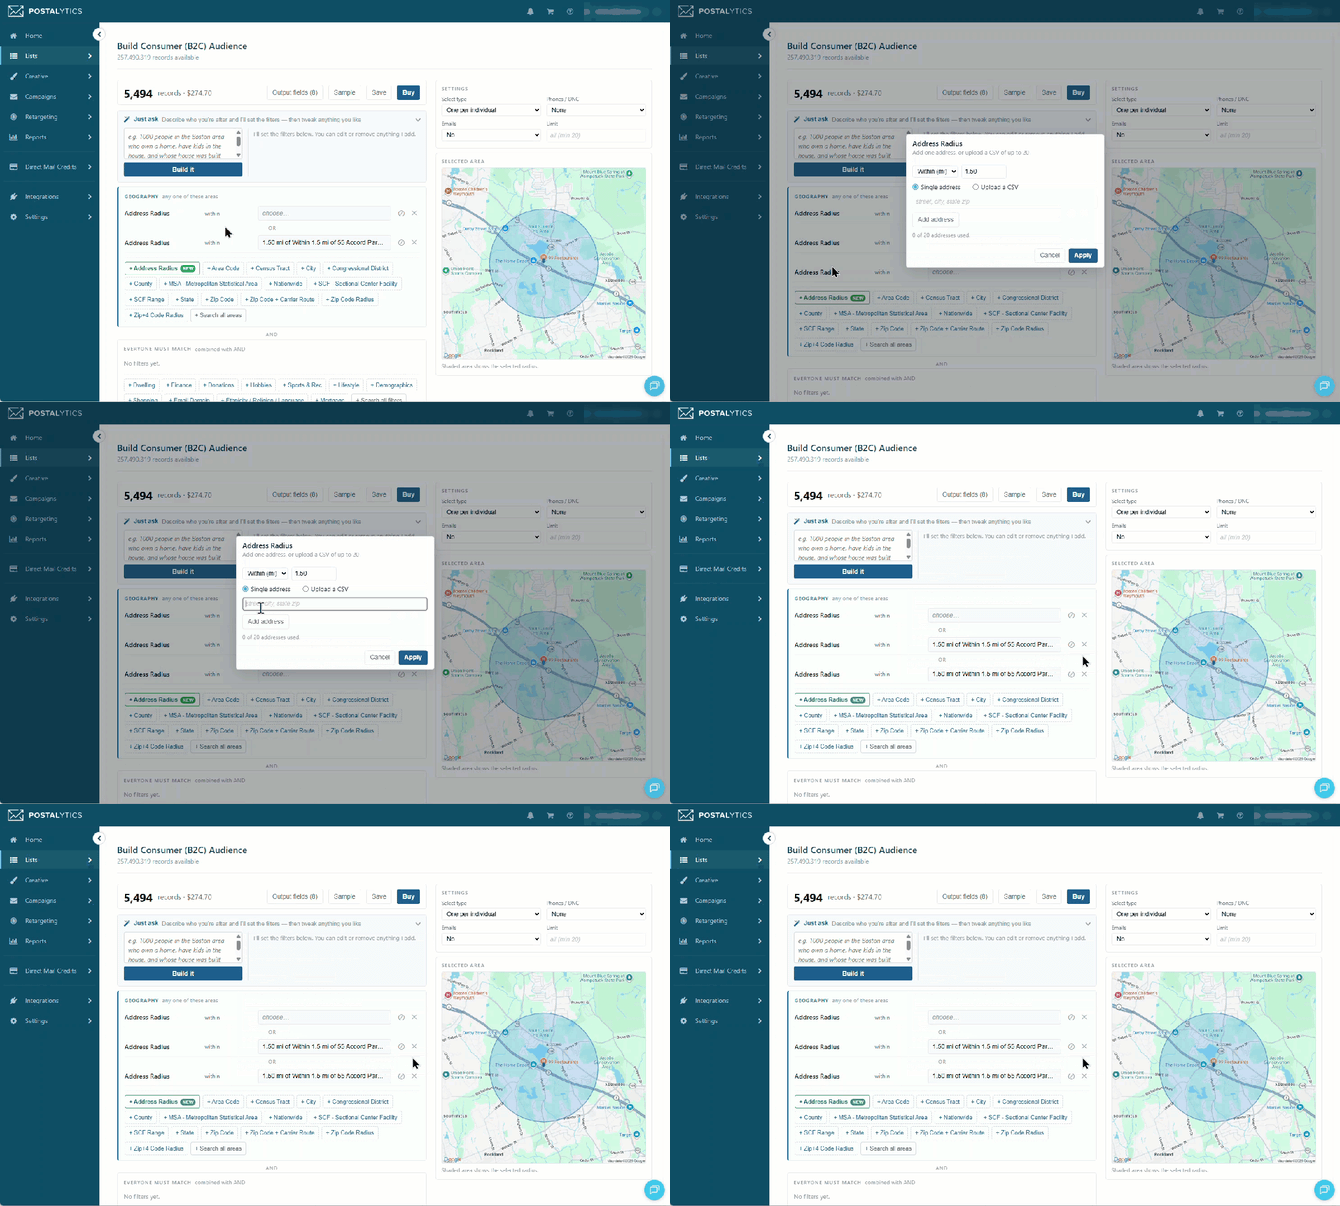
Add Filters: Click “+ Search all filters” (or “+ Search all areas” in the Geography section) and start typing to search every filter the data source offers, so there’s no need to dig through categories to find what you’re looking for.
For the filters people use most, like city, zip code, state, and county, you’ll see quick buttons you can click right away.
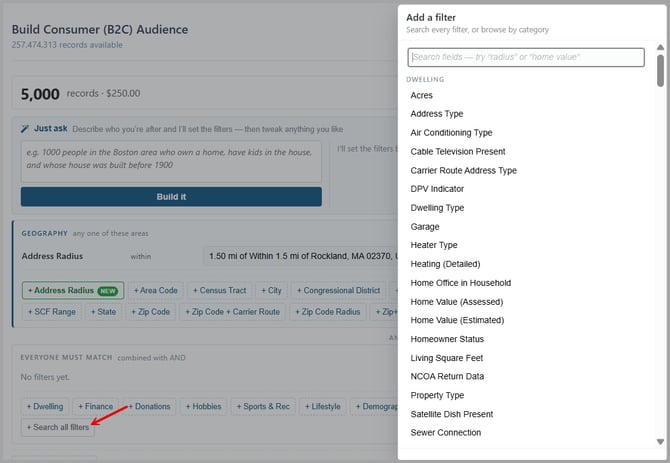
Selects: This area will display one of a few different select types based on the subcategory selected. Below is an example of each:
- Search - The search box allows you to type in search text with the results shown below it. Click anywhere on the row to select. Multiple selections can be made.
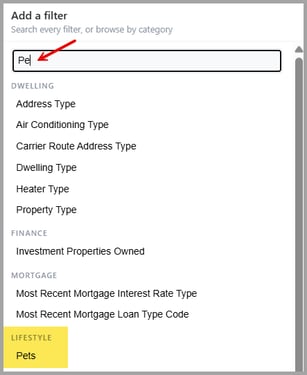
-
Preset List - Some subcategories have a small pre-defined list of selects, and will not offer the search feature. Click the selections desired. Multiple selections can be made.
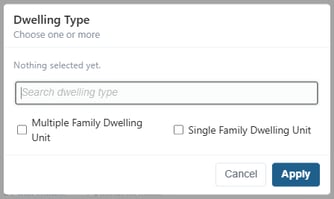
-
Range - Some subcategories require a range of values. In these cases, enter the two values and click the plus to add the select.
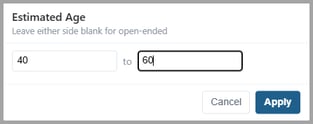
-
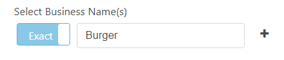
Freeform - Some subcategories require freeform text. The text can be matched as “Exact” or as “Like” using the toggle. If toggled to “Exact” the text must match exactly. If toggled to “Like”, it will match a partial of the text entered.
-
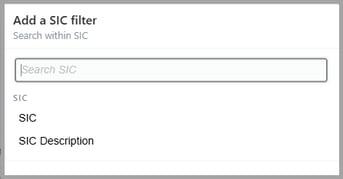
SIC Codes - This is a special sector only available in the business data source categories. The ability to search for an SIC code(s) by description is available.
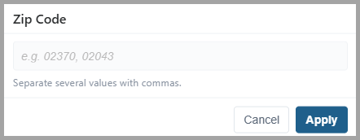
Several values at once: You can enter more than one value at a time by separating them with commas. For example, type “02370, 02043” to add two zip codes in one step.
How Filters Work Together: The builder follows two simple rules and labels them on the page, so you always know how your audience is being built.
- Areas widen your audience: Geographic areas you pick (cities, zip codes, states, counties, and address radii) add together, so a record only needs to fall in “any one of these areas.” For example, if you choose Portland, CT and Portland, ME, records from both cities are included.
- Everything else narrows it: All other filters must be true for every record (“everyone must match”). For example, if you choose a single family dwelling for Address Type and 30 to 75 for Estimated Age, only people who live in a single family home AND are between 30 and 75 are included.
- “Or” groups handle “this or that”: When records only need to match one of several filters, click “+ Add a one-of group”. For example, an “or” group with Camping / Hiking, Fishing, and RV Owner includes people who like camping OR fishing OR own an RV.

Remove: Clicking the X (remove) icon on a filter will remove it and recalculate the count. Clicking on the X (remove) icon in line with the One-Of Grouping heading will remove the entire grouping and recalculate the count.

Start Over: To begin again from scratch, click “Start over” to clear and remove every filter and the limit, and start a new audience.
Output Fields and Sampling the Data
Output Fields
Once your selections are made, ensure your output fields include all of the data fields you want to export.
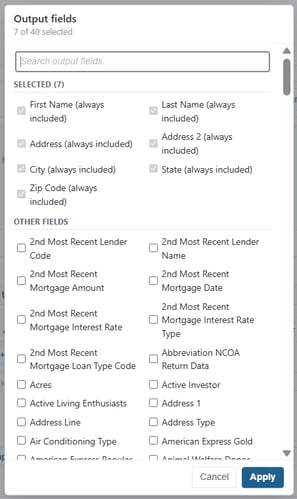
Clicking “Outputs” displays a set of checkboxes representing all of the output options available for that particular data source category.
All of the required mailing output fields are pre-selected and cannot be unselected. If phone or email has been selected in the prior steps, those will automatically be selected as output fields here. Up to 40 output fields can be selected, if desired.
Sample the Data
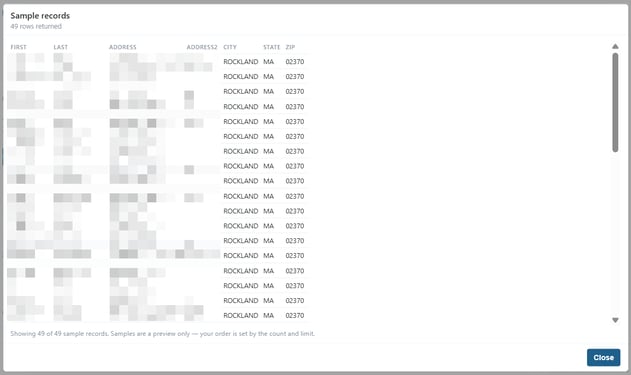
Clicking “Sample” will query the data source for up to about 50 records matching the selections and show a pop up window with the name and address results. We recommend using this feature as a check before purchasing the list.
Buy a List & Import
Buy a List
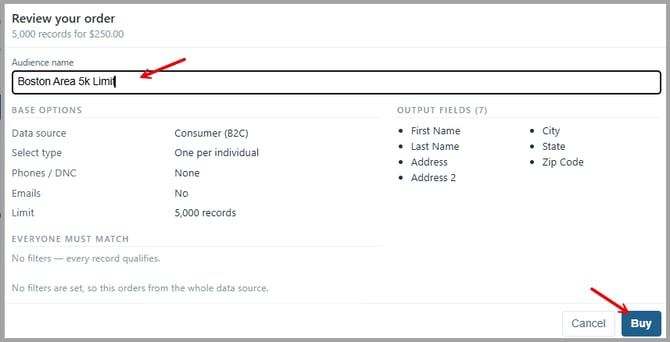
Click “Buy” to open a review screen that shows everything on one page: every filter, your settings, and the columns you’ll receive. Take a moment to look it over before you continue. You can also rename your list here.
Clicking the “Buy” button again on this page will walk you through the final checkout process.
List Import
Once an audience has been created, and the list purchased, the data is automatically mapped and imported into your account. Field mappings are done based on the output fields selected.
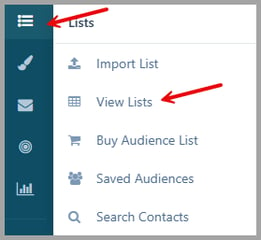
To view the list, click “View Lists” from the main Lists menu.
Saved Audiences
Saved Audiences contains the specs for a list that has been purchased, or when you click “Save” in the builder (unpurchased audiences are labeled DRAFT).
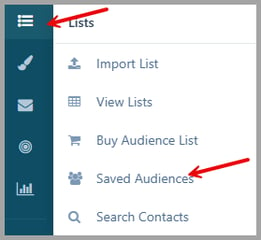
In the Saved Audiences view you will see your library of List Audiences created. Here you can view, search, sort, and page through existing audiences, as well as:
- Check the status of the audience being processed
- Clone an audience
- Delete an audience
- Manually retry
Clone: Copy the full set of selects and outputs previously chosen, to use as the starting point for a new audience. Clicking “Clone” will copy the audience configuration and redirect to the selection screen with all of the filters populated. Edit as needed.
Delete: Remove the audience selection from the account.
Retry: If an audience list has not been imported within 15 minutes, the option to do a manual retry is available. If the problem persists, please contact support@postalytics.com.