
For MailBack™ to capture leads, the pixel snippet must be installed on your website. You get the snippet on the final step of pixel setup (and any time from the pixel itself).
Get your snippet
.png?width=670&height=280&name=mailback-pixel-created-successfully-jul2026(1200px).png)
Copy the snippet from the last step of the setup wizard, or open the pixel later to retrieve it. It's a small piece of code unique to that pixel.
Where to paste it
Add the snippet to every page you want to track, just before the closing </body> tag. The easiest way is to add it to your site's global footer/template so it loads site-wide.
Common platforms
WordPress — Theme footer (footer.php), a "header & footer scripts" plugin, or your theme's custom-code area.
Shopify — theme.liquid, just before </body>.
Google Tag Manager — Add as a Custom HTML tag firing on All Pages.
Wix / Squarespace — Use the site-wide custom code / embed feature.
Custom site — Your shared layout/template before </body>.
Tip: Installing in a global template means new pages are covered automatically — no need to add it page by page.
Turn the pixel on
Installing the snippet doesn't start collection by itself. Once it's in place, open the pixel and click Go Live — see Pixel Status.
Confirm it's working
After it's live and installed, visit your site, then check the pixel's Report over the next day for incoming leads. Lead delivery isn't instant — see Why am I not seeing leads yet?.
Pixel Verification Status
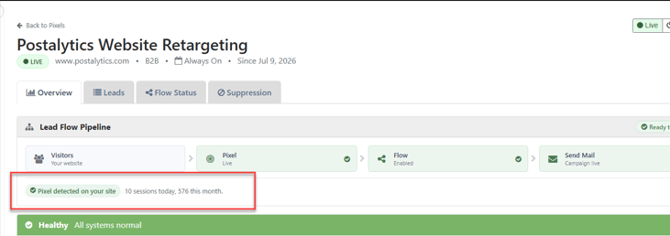
The dynamic Pixel Status Checker automatically verifies that your Postalytics Tracking Pixel is installed and firing correctly on your website.
Even after switching a campaign from Test to Live mode, improper installation or missing code can prevent your web tracking and trigger features from functioning. This tool continuously monitors your site and provides real-time feedback on your pixel's health.
Related articles
Creating a New MailBack™ Pixel
Pixel Status: Live & Off
Pixel Not Collecting Leads